- ホーム
- ブログ
- Google Apps Script
- GASでWebアプリ(じゃんけんゲーム)を作成する
GASでWebアプリ(じゃんけんゲーム)を作成する
はじめに
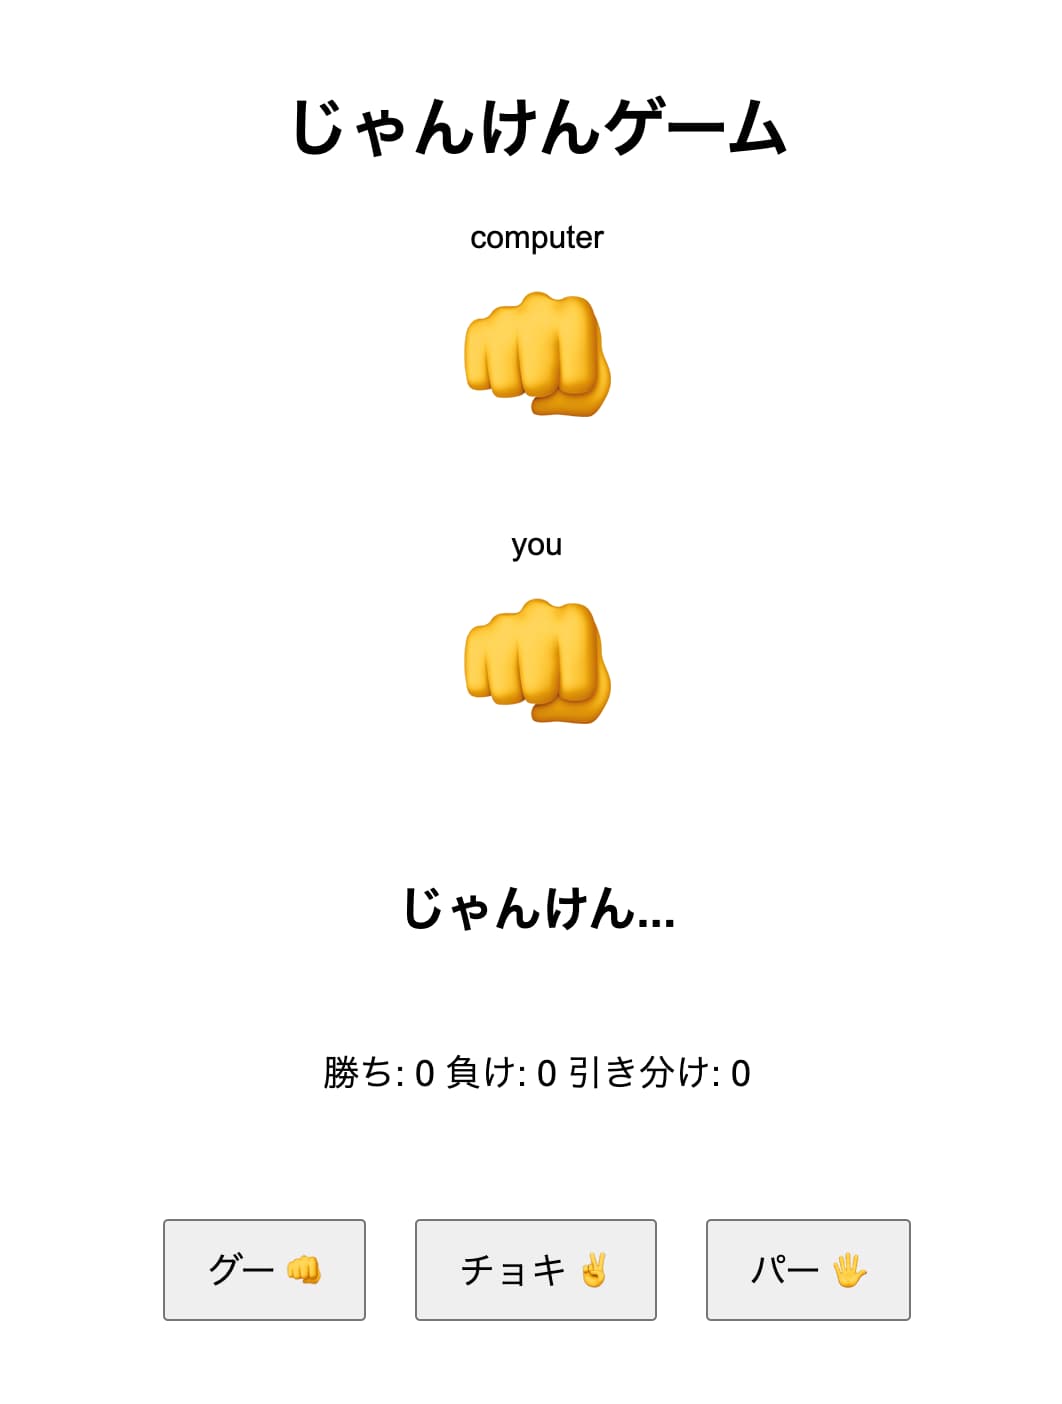
今回の記事は、Google Apps Scriptを使ってじゃんけんゲームを作ってみようという記事になります。通常htmlファイルをデプロイするにはサーバーが必要ですが、Google Apps Scriptを使うことで、サーバーを使わずにhtmlをデプロイすることができます。 初心者でも簡単にWebアプリを作成することができて、デプロイとは何か、htmlや、css、javascriptの関係など勉強になると思います。作ったものはこちらになります。
今回やること
- じゃんけんゲームのhtmlファイルを作成する。
- 作ったhtmlを元にしてGASでWebアプリを作成する。
- デプロイして、挙動を確認する。
- 「styleタグ」と「scriptタグ」を外部ファイルに分ける。
- まとめ
htmlファイルの作成
じゃんけんゲームのhtmlファイルを作成します。ファイル名をindex.htmlとして以下のようなコードを作成しました。コピペして、ローカルで開いてみて、じゃんけんゲームができることを確認してください。
<!DOCTYPE html>
<html lang="ja">

<head>
    <meta charset="UTF-8">
    <title>じゃんけんゲーム</title>
    <style>
        body {
            font-family: Arial, sans-serif;
            text-align: center;
            margin: 20px;
        }

        .choice-btn {
            font-size: 18px;
            margin: 10px;
            padding: 10px 20px;
            cursor: pointer;
        }

        #result {
            margin-top: 20px;
            font-size: 24px;
            font-weight: bold;
        }

        .hands {
            font-size: 80px;
            margin: 20px 0;
            display: flex;
            flex-direction: column;
            text-align: center;
        }

        .score {
            margin: 30px;
            padding: 20px;
            font-size: 18px;
        }
    </style>
</head>

<body>
    <span style="padding: 20px"></span>
    <h1>じゃんけんゲーム</h1>
    <div class="hands">
        <span style="font-size : 12pt">computer</span>
        <span id="computerHand">👊</span>
        <span style="padding: 15px"></span>
        <span style="font-size : 12pt">you</span>
        <span id="playerHand">👊</span>
        <span style="padding: 15px"></span>
    </div>

    <div id="result">じゃんけん...</div>
    <div class="score">
        勝ち: <span id="wins">0</span>
        負け: <span id="losses">0</span>
        引き分け: <span id="draws">0</span>
    </div>

    <div>
        <button class="choice-btn" onclick="play('グー')">グー 👊</button>
        <button class="choice-btn" onclick="play('チョキ')">チョキ ✌️</button>
        <button class="choice-btn" onclick="play('パー')">パー 🖐️</button>
    </div>

    <script>
        let wins = 0;
        let losses = 0;
        let draws = 0;

        const hands = {
            'グー': '👊',
            'チョキ': '✌️',
            'パー': '🖐️'
        };

        function play(playerChoice) {
            const choices = ['グー', 'チョキ', 'パー'];
            const computerChoice = choices[Math.floor(Math.random() * choices.length)];

            document.getElementById('playerHand').textContent = hands[playerChoice];
            document.getElementById('computerHand').textContent = hands[computerChoice];

            let result;
            if (playerChoice === computerChoice) {
                result = '引き分け!';
                draws++;
            } else if (
                (playerChoice === 'グー' && computerChoice === 'チョキ') ||
                (playerChoice === 'チョキ' && computerChoice === 'パー') ||
                (playerChoice === 'パー' && computerChoice === 'グー')
            ) {
                result = 'あなたの勝ち!';
                wins++;
            } else {
                result = 'コンピュータの勝ち!';
                losses++;
            }

            document.getElementById('result').textContent = result;
            updateScore();
        }

        function updateScore() {
            document.getElementById('wins').textContent = wins;
            document.getElementById('losses').textContent = losses;
            document.getElementById('draws').textContent = draws;
        }
    </script>
</body>

</html>
GASでWebアプリの作成
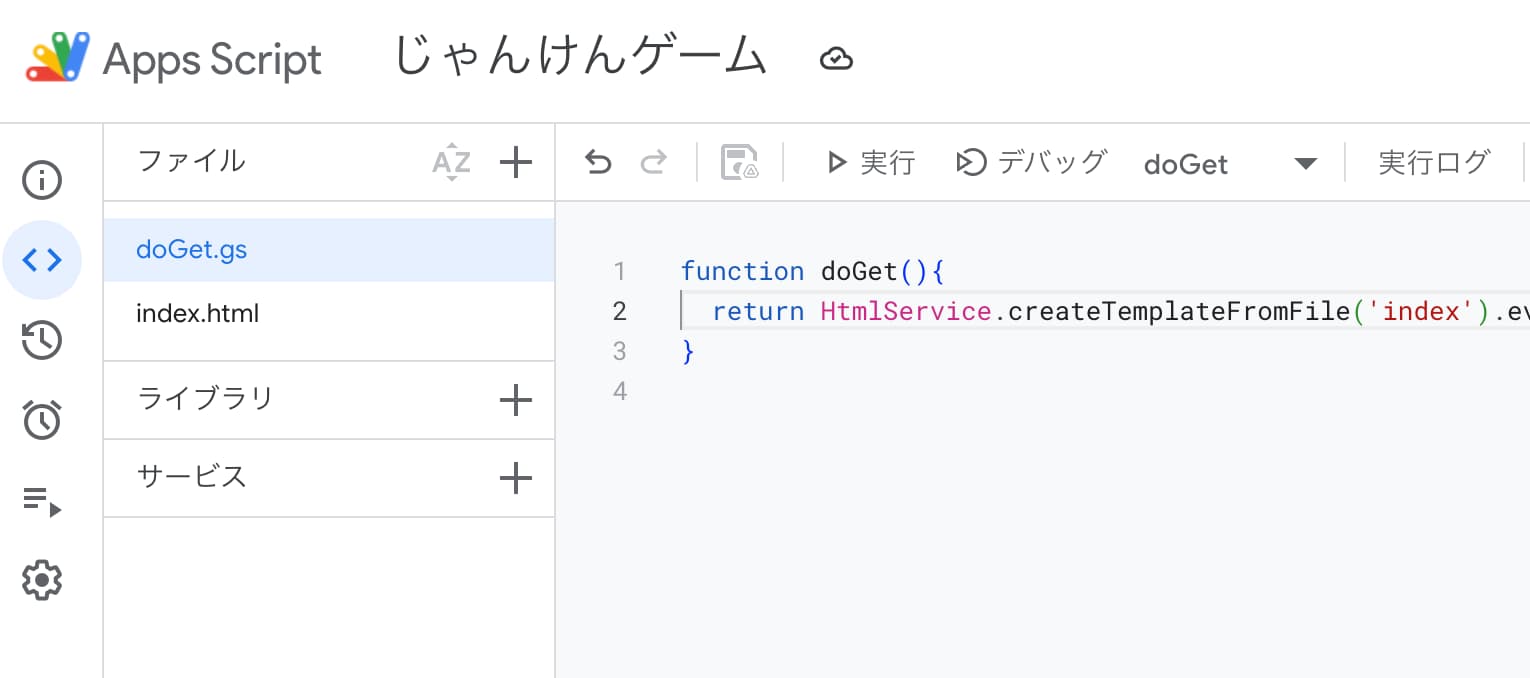
挙動が確認できたら、GASでWebアプリを作成します。GASのエディタを開いてindex.htmlを作成し、上記のコードを貼り付けます。

doGet関数の作成

function doGet(){
    return HtmlService.createTemplateFromFile('index').evaluate().setTitle('じゃんけんゲーム');
}
doGet関数は、ウェブアプリへのアクセス(GETリクエスト)があった際に、最初に実行される関数です。
HtmlService.createTemplateFromFile('index')は、エディタ内に保存されたHTMLファイル(index.html)を読み込み、それをテンプレートとして利用するためのメソッドになります。
その後、evaluate() メソッドを呼び出すことで、テンプレートを評価し、最終的な HTML出力オブジェクトを作成します。setTitle('じゃんけんゲーム')は、タブに表示する文字です。
またcreateTemplateFromFile()は、HTMLファイル内で変数を扱うことができます。
デプロイ
作成したhtmlファイルをデプロイします。
デプロイの方法は、こちらなどを参考にしてください。
あっという間に「じゃんけんゲーム」の完成です。

styleタグとscriptタグを外部ファイルに分ける
これで完成ですが、可読性と保守性を考えて、styleタグとscriptタグ部分を外部ファイルに分けてみます。
style.htmlの作成
style.htmlファイルを作成し、index.htmlのstyleタグの部分を移動させます。
<style>
    body {
        font-family: Arial, sans-serif;
        text-align: center;
        margin: 20px;
    }
    ....

    // 以下省略
</style>
javascript.htmlの作成
javascript.htmlファイルを作成し、index.htmlのscriptタグの部分を移動させます。
<script>

    let wins = 0;
    let losses = 0;
    let draws = 0;

    const hands = {
        'グー': '👊',
        'チョキ': '✌️',
        'パー': '🖐️'
    };
    ....

    // 以下省略
</script>
include.gsの作成
function include(filename) {
    return HtmlService.createHtmlOutputFromFile(filename)
        .getContent();
}
style.htmlとjavascript.htmlファイルを変数として、index.htmlの中で呼び出すためのコードとなります。
HtmlService.createHtmlOutputFromFile()は、エディタ内に保存されたHTMLファイルを、そのままHTML出力オブジェクトとして生成するためのメソッドです。静的なHTMLファイルをそのまま読み込む場合に使用します。変数の取り扱いはできません。
getContent()メソッドで、読み込んだHTMLファイルの文字列を取得することができます。
index.htmlの修正
今までの処理により、新たに作成したindex.htmlは以下のようになります。
<!DOCTYPE html>
<html lang="ja">

<head>
  <meta charset="UTF-8">
  <title>じゃんけんゲーム</title>
  <?!= include('style'); ?>
</head>

<body>
  <span style="padding: 20px"></span>
  <h1>じゃんけんゲーム</h1>
  <div class="hands">
    <span style="font-size : 12pt">computer</span>
    <span id="computerHand">👊</span>
    <span style="padding: 15px"></span>
    <span style="font-size : 12pt">you</span>
    <span id="playerHand">👊</span>
    <span style="padding: 15px"></span>
  </div>

  <div id="result">じゃんけん...</div>
  <div class="score">
    勝ち: <span id="wins">0</span>
    負け: <span id="losses">0</span>
    引き分け: <span id="draws">0</span>
  </div>

  <div>
    <button class="choice-btn" onclick="play('グー')">グー 👊</button>
    <button class="choice-btn" onclick="play('チョキ')">チョキ ✌️</button>
    <button class="choice-btn" onclick="play('パー')">パー 🖐️</button>
  </div>

  <?!= include('javascript'); ?>

</body>

</html>
ここで、スクリプトレットという記法が出てきます。headタグにある<?!= include('style'); ?>と、bodyタグにある<?!= include('javascript'); ?>です。
これは<?! ?>の中に、変数や関数を入れることにより動的にhtmlを表現できるというGASのしくみです。
これにより外部ファイルにしたstyle.html、javascript.htmlファイルをindex.htmlの中で、include()関数を使って呼び出すことができるようになります。
まとめ
以上で、GASでWebアプリを作ることができました。
いろいろコードをいじってみて、楽しんでください。
可茂IT塾ではFlutter/Reactのインターンを募集しています!
可茂IT塾ではFlutter/Reactのインターンを募集しています!可茂IT塾のエンジニアの判断で、一定以上のスキルをを習得した方には有給でのインターンも受け入れています。
Read More可茂IT塾ではFlutter/Reactのインターンを募集しています!
可茂IT塾ではFlutter/Reactのインターンを募集しています!可茂IT塾のエンジニアの判断で、一定以上のスキルをを習得した方には有給でのインターンも受け入れています。
Read More